 Most weeks Mo Jo Monday Challenge is just for fun. But the first week of every month they offer a prize for the top picks. That makes it even more fun. They'll choose one winner for every 50 entries, up to a max of SEVEN winners!!! Winners will receive the
Verve Stamps set of their choice.
The base is sand colored, topped with chocolate brown then "enamored embrace" from the Le Romantique collection by Graphic 45. I don't know where the paper with the clock came from. I made an svg file for the lamp and did a shadow cut in black. I attached the lamp to a gold metallic circle mounted on a gold shimmer paper cut with SB scalloped circles. The sentiment "You brighten my day" is printed on acetate using the mirror option , then rubbed on. The metallic gold reflects behind the lamp brightening the card. The clock suggests a day. Pretty symbolic I think.
I know its not a good picture, but after several attempts it will have to do. Any way if I don't win...I can say it's because they can't see the real beauty of this card. Silly me:)
Most weeks Mo Jo Monday Challenge is just for fun. But the first week of every month they offer a prize for the top picks. That makes it even more fun. They'll choose one winner for every 50 entries, up to a max of SEVEN winners!!! Winners will receive the
Verve Stamps set of their choice.
The base is sand colored, topped with chocolate brown then "enamored embrace" from the Le Romantique collection by Graphic 45. I don't know where the paper with the clock came from. I made an svg file for the lamp and did a shadow cut in black. I attached the lamp to a gold metallic circle mounted on a gold shimmer paper cut with SB scalloped circles. The sentiment "You brighten my day" is printed on acetate using the mirror option , then rubbed on. The metallic gold reflects behind the lamp brightening the card. The clock suggests a day. Pretty symbolic I think.
I know its not a good picture, but after several attempts it will have to do. Any way if I don't win...I can say it's because they can't see the real beauty of this card. Silly me:)
Some cause happiness wherever they go; others, whenever they go.
- Oscar Wilde
 Wishing you a productive and creative week. Craft on... Carole
I created this card by using a sample from a card collection I purchased years ago. I loved the design and spent hours figuring out how to recreate it. Now how do I explain it?
The black square (featuring the trophy) opens to reveal the inside design. It features a black and white striped scalloped edge folded over and glued down. It reminds me of an awning. I used a svg file from SVGCUTS.Com that features a Studebaker (definitely a classic) to tie in with the #1 Classic trophy that I designed and created an svg file for. I'll offer that free if your interested in it. Just let me know.
I created this card for a friend that my husband worked with who is celebrating his 65th birthday and retirement.
I used little magnets on the corner to hold the square down. Velcro circle would work as well. I used outline chain sticker for the square and the Happy Birthday Sentiment. I know this sounds a bit convoluted, but it is so hard to explain. If you have any questions please leave a comment and I'll reply.
I must say that I'm pleased to have created this design. I'll be happy to share it with you if you are interested.
All art requires courage. ~Anne Tucker
Be well. Thanks for visiting. Comments are appreciated. Carole
Here's a card I made using the svg files I offered in August. I'll enter it in CAS-ual Friday challenge. CFC19: Use paper piecing on a fall themed Clean And Simple project.
For the background trees I used a free file from SVG Cuts, then punched some leaves in orange, green and yellow. I distressed them with some brown ink and glued them randomly across the top. I glued some dried Spanish moss on the bottom for some dimension. I glued Mamma deer on and used pop dots for the fawn. The sentiment I wrote on the same sand colored paper as the base and inked the outline. The card measures:5 1/4" X 4 1/4". Next time I'll use the deer on a bigger card.
One of my favorite blogs is The Paper Boutique. Linda offers great videos, and on Friday's she shares 5 blog sites that she's discovered. This week Linda is also offering a contest asking her followers to share their favorite tips. Wow...I learned some great tips. My favorite is from an anonymous follower who wrote that she saw a u tube video that showed rubbing pieces of Styrofoam together creates a fine snow-like crumbs, similar to Flower Soft. How great is that? I immediately tried it and filled a baby food jar with this snowy type substance. Then I experimented with adding Adirondack alcohol ink in the jar. Several drop of the citrus ink produced a lovely lime green... so I rubbed some more Styrofoam together filled a jar and added several drop of sail boat blue creating a pretty baby blue. How fun...and thrifty. I'll leave the lids off the until the alcohol evaporates, then I'll make a card using it. I just can't wait.
In every real man a child is hidden that wants to play. ~Friedrich Nietzsche
I want to be a little girl when I grow up - so I can play and play all day -
Be well... share some joy - add a comment;) Thanks for visiting. Carole
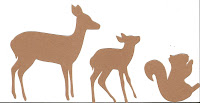
 Today I traced an image of deer, cut it out by hand on black card stock, then scanned it. I opened SCAL and using the trace image feature I was able to create an svg file. Pretty neat! I did the same for the squirrel. I ran a test cut on my cricut...I cut the fawn at 2 1/2" and the doe at 4" and the squirrel at 2".
I am offering these files free to my followers. So if you're interested and are able to use an svg file just send me an email: carole.sweeney02@gmail.com I believe I can send it as an attachment. It will show up as an inkscape file. that's the link for the free program.
Does anyone have advise on how to offer downloadable files? Your information would be greatly appreciated.
 |
| test cut |
That's all for now. Stay safe and pray that Hurricane Irene won't cause to much damage.
 A very dear friend is celebrating her birthday this month. With her on my mind I created this brilliant red and velvety black card. She's a Leo of course, so she likes red as her power color. The black is a flocked plastic I recycled from some cologne packaging. The flower is made from the punched out parts of the SB Fleur De Lis shapeabilities pendants. There were 12 petals from each cut. They were beautifully embossed as well, so I had to use them. I just glued them on a circle and there is a lovely flower with a rhinestone in the center.
The inside has a martini glass I created in SCAL and cut it on acetate. I used spray adhesive to mount it on the card then had cut an olive an stir stick. I placed a second piece of acetate over them again using spray adhesive. I used a gel pen to outline it so you can see it and printed the verse. Jenny and I have declared that it is the "S" in martinis that creates a problem. I'll line the envelope with the same brilliant red and post it this week. I hope she enjoys it.
Thanks for looking. Please leave a comment:) Be well
What art offers is space - a certain breathing room for the spirit. - John Updike
My grandson ,Wyatt will be 5 this month and he wants to be a cowboy, I think he should be the Sheriff! So I made this shaped card for him. I scan my cards, because my computer is not adequate to download picture. So what looks like black is actually gold metallic paper. I had a dickens of a time trying to create it in scale. It just wouldn't come together, so I made 2 separate pieces and glued two of the circle points together so it opens. The inside says: "Have a rootin' tootin' Birthday" I plan on making a memory box for him with horses, cowboy boots and cowboy hats. I'll post that when complete. My work space is a mess. I spent way too much time on this, but I'm sure Wyatt will wuv it. That's all for now. Thanks for looking. Be well
Yesterday my daughter Corina the owner of 3 yoga studios in the Philadelphia area, asked if I could make a memory box for a Yoga teacher that was leaving for a year to get her PHD. Tina has been a much loved student and a teacher at Wake Up Yoga since 2006. This is the memory box I made using the colors of the studio www.wakeupyoga.com I always save the card board from paper collections and various packaging and I had all I needed on hand. I chose to make it 9"X 12"X 3" and assembled the box using duct tape to secure the pieces together. I covered the inside with a glimmer paper in brilliant yellow, wrapping all the edges before assembling.The box is covered in a beautiful gold card stock. I cut the letters and made a shadow cut to back them. I created some svg files of a budda and yoga poses and cut them with my cricut. I printed the chakra symbols and cut them by hand. The lotus flowers are from the Pagado cartridge. The swirl flourishes are from sixxiz. This was a labor of love. I worked for my daughter Corina, as a bookkeeper for a few years before I retired, so I know and love Tina. She is an amazing young woman and I hope that all her students will fill the box with cards acknowledging the gift she shared teaching yoga. The top shows Wake Up Yoga in an octagon, the front (not visible) says:loves Tina. The octagon was created in SCAL featuring the Budda showing the chakras. This was a two day project and I'm sure I could improve on it. Now that it's complete I have more ideas. Thanks for visiting. Comments are appreciated!


 Wishing you a productive and creative week. Craft on... Carole


